
Hi – and if you’re joining us for the first time from CitricSugar today, welcome!
Our guild was pretty excited to participate in the Madrona Road Challenge that has been going on! We still have some members finishing up their pieces, as we only got our fabrics at the beginning of this month, but it’s been fun to see what people have been coming up with and we’ll post when we’ve got all the finishes!

At the time I got my fabrics, I was also thinking that I needed some kind of tote to take to meetings and generally keep all my guild biz organized. I wanted it to have pockets and room for my binder, clipboard, name tag, and any day-specific supplies.
Then I get the fabrics. Then I get an idea! Two birds. One stone.
Madrona Road Challenge + a dearth of appropriate tote bag = The Quilt-As-You-Go Guild Bag!!
I thought about what I needed, how I wanted it to look, made a little sketch to plan it out for myself and away I went…
If you’d like to make your own, read on! (Photo heavy… be warned.)
***Edited to add: Finished size of bag is approximately 12″wide x 13″ high to top of bag x 4″ deep. Bag height to top of handles is about 22″. Feel free to tinker with the dimensions – just adjust your cutting list to meet your needs!***
Grab the following items:
- Fabrics: Use a mix of quilting weight cotton fabrics (yardage and scraps). Since the panels are quilted to give them support, this isn’t really suitable for laminates or oil cloths. You can try experimenting with home decor weight but added bulk will wreak havoc with some of the thicker seams. Use your best judgement.
- Batting: You will need batting pieces just a little larger than each of your exterior pieces. Go with a low loft cotton, or bamboo, etc. This is not the time or place for flooffy, high-loft poly batt.
- Fusible fleece or interfacing: I had fleece so that’s what I used. Interfacing will also work. Use what you’ve got handy.
- Zipper: 9″ or longer (completely optional if zippers terrify you or you have no experience with them)
- Cardboard or stiff card stock for bottom of bag, 4×12″ (optional)
- Tools and Notions: Rotary cutter, ruler & mat, thread to match or contrast your fabrics, chalk or other non-permanent marking tool, sewing machine & feet that suit your sewing style – zipper, 1/4″, zigzag, etc, iron & pressing surface, seam ripper (gather it and may you never need it), a new sewing machine needle (if your machine hates thick seams, try using a denim needle for the construction part of this project!)
Now, a few notes:
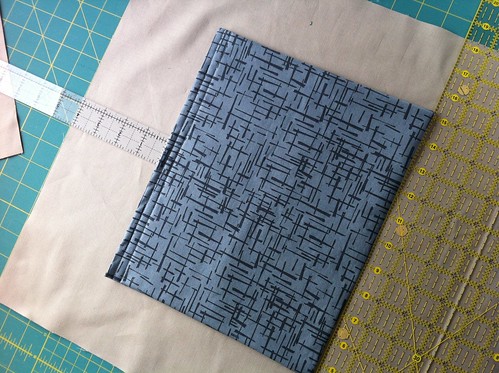
- Yardage: I was working from a specific set of fabrics and rules. I had two fat quarters, 4 four fat eighths of the Madrona fabrics. According to challenge rules, I could only add the same line or solids to complete my piece. I purchased a one yard cut of extra fabric and added a yard of solid from my stash. I also had leftovers. You can probably make this with under three yards of fat quarters, yardage and scraps, depending on what look you want to achieve. It’s very adaptable. Interface the straps if you like. Make it yours.
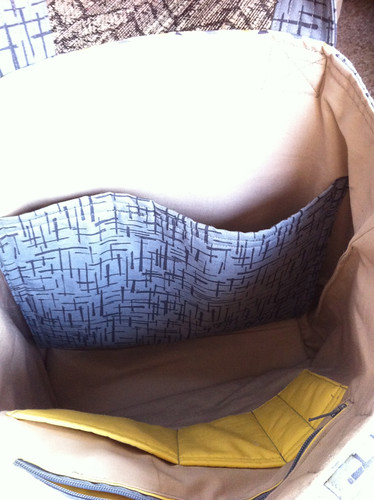
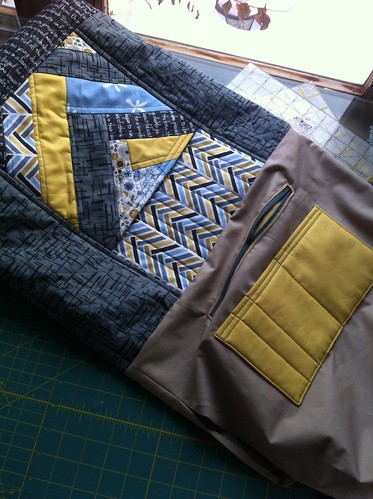
- Pockets: All of the interior pockets are optional. If zippers scare you, skip the zip pocket. If you hate divided or large inside pockets, bypass those. If you want smaller or larger pockets, go for it! It’s your bag, you decide. Just remember to adjust your math and yardage accordingly.
- Cutting and Seam Allowances: Most of the seams are 1/2″ unless otherwise stated. This is to give it a little extra structure after securing seams and for wiggle room – If you find that when trimming your pieces, they end up slightly smaller than what is listed, trim them to use a 1/4″ seam allowance instead. Just remind yourself that that’s what you did, ok?
- Photos: Let’s keep it real, folks.With this tute, I’m sharing my process photos. I didn’t start out thinking I was going to do a tutorial but that’s how it goes sometimes. I am not a full-time blogger or quilter; this is my spare time, sneak-it-in-when-I-can thing, so I don’t have an SLR camera, great lighting or consistent parts of the day to sew in. Thus, the lighting is inconsistent and the photos are passable. Award-winning? Nah. Am I okay with that? Yep.
Here’s a quick sketch with the parts outlined for you:
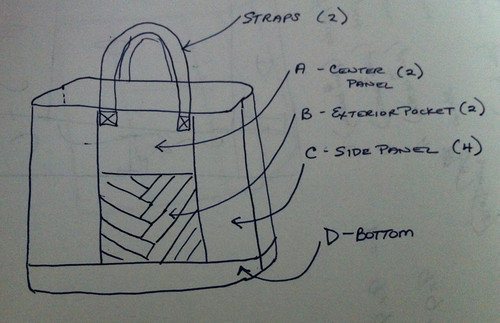
Cutting List (width by height):
For exterior:
- Centre Panel (A) – Cut 2 fabric 9×13″; Cut 2 batting 9.5 x 13.5″
- Pocket Panel (B) – Cut 2 fabric 9×9″ for lining; Cut 2 batting 9.5 x 9.5″; Assorted strips or scraps to cover batting
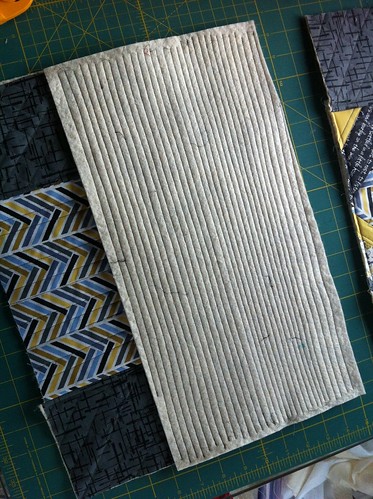
- Side Panels (C) – Cut 4 fabric 5×13″; Cut 4 batting 5.5 x 13.5″
- Bottom Panel (D) – Cut 1 fabric 17×9″; Cut 1 batting 17.5 x 9.5″
For Interior:
- Interior Lining (E) – Cut 1 fabric 17×33″
- Divided Pocket (F) – Cut 1 fabric 11×10″; Cut 1 fusible fleece 10.5 x 4.5″
- Large Interior Pocket (G) – Cut 1 fabric 11×18″; Cut 1 fusible fleece 10.5 x 8.5″
- Zip Pocket (H) – Cut 2 fabric 10×7″
For Straps:
- Straps (I) – Cut 2 fabric 6×23″
Instructions (Read BEFORE starting):
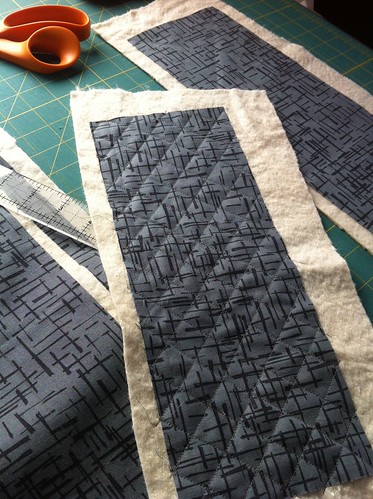
1) Make A, C, and D panels.

Take one fabric A and centre on one batting A. Quilt as desired and trim to 9×13″. The more densely you quilt, the more structure your bag will have. Too little quilting will make your bag super floppy, instead of moderately slouchy, which is what we’re going for here.
(Don’t worry if your fabric doesn’t stretch right to the edge. You’ll be attaching the panels with a 1/2″ seam allowance so as long as it’s within that range, you’re good. )
Repeat with other A panel. Then repeat with all 4 C panels, trimming to 5×13″, and with D panel, trimming to 17×9″. Set aside.
2) Make Exterior pockets – B. Make 2.
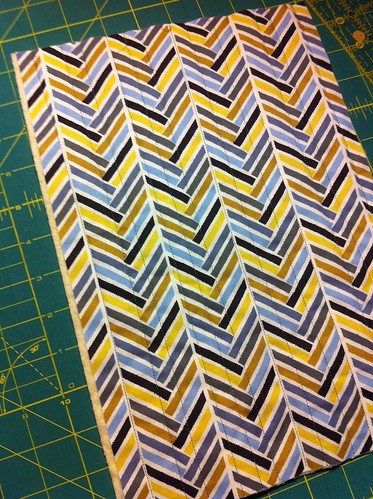
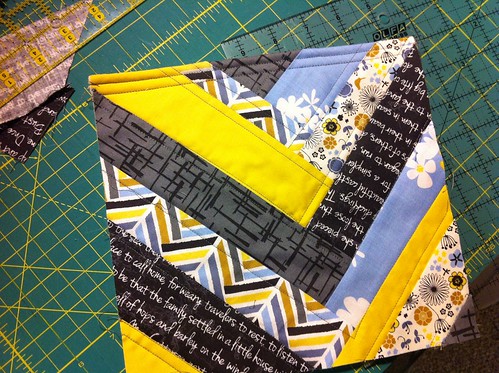
Since I was using a herring bone print for my A panels, I decided to quilt the pockets (B) using a freeform herringbone design. You may use whatever design you like but the instructions below are for the herringbone and should give you a good idea of how to quilt-as-you-go for making a different pattern.
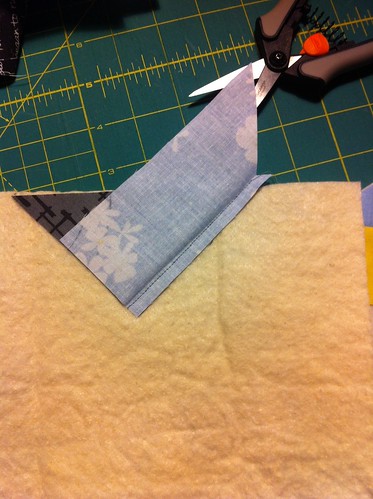
Take one batting B and lay on work surface. Grab or cut a triangle-shaped scrap and lay along top edge of batting RS up. Lay a strip of a different fabric along a lower edge of triangle WS up. Sew with a 1/4″ seam allowance. Press strip away from triangle.

Along other lower edge of triangle and strip you’ve just sewn, lay another strip down (WS up) so that it crosses the seam. Sew. Press away from triangle.
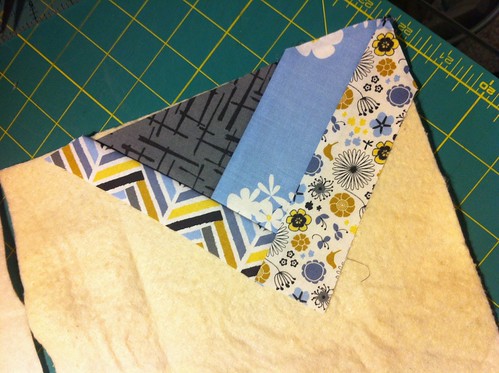
Repeat this process, sewing strips on alternating sides, until batting is covered. Add further quilting if desired. Trim to 9×9″.
Lay fabric lining B on top of quilted B, RST, and sew a 1/2″ seam across top. Press and flip the fabric over so that RS of both are facing out. and press along seam. Topstitch 1/4″ from top edge; topstitch 1/4″ below that.
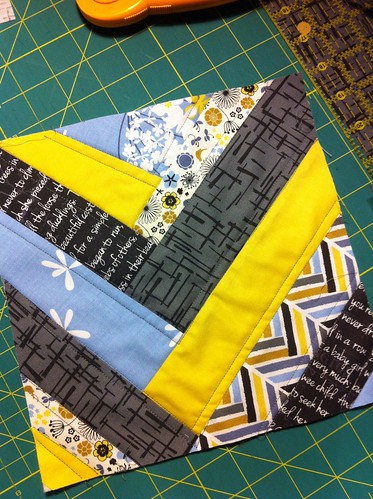
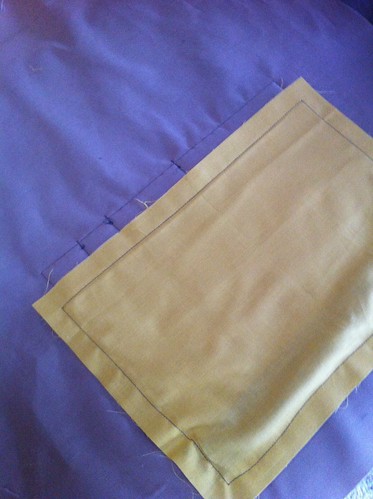
3) Make Centre Pocket Panel AB. Make 2.
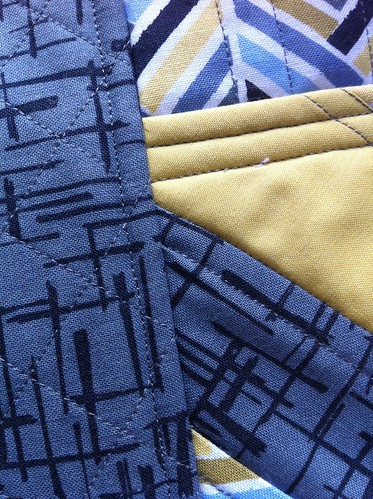
Place one Ext. Pocket B on top of one Centre Pocket A, RS facing up, aligning bottom and side edges. Sew a 1/4″ seam along edges where pocket and centre meet to secure.

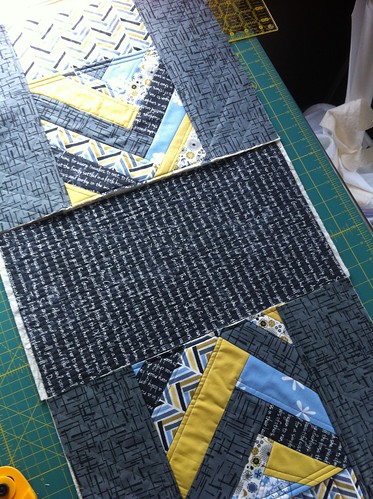
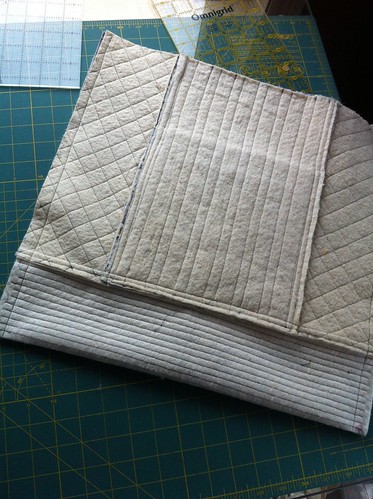
4) Attach Side Panels C. Make 2 Side Panels (C+AB+C).
This is where seams can start to get a little bulky. Go slowly over the thickest parts.

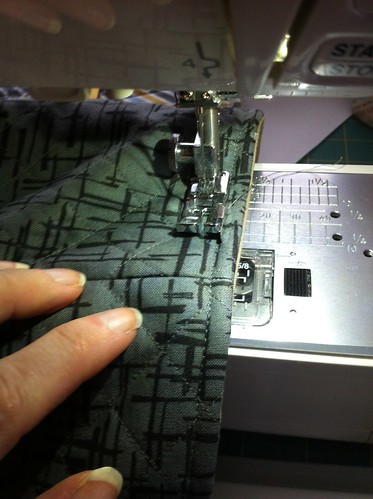
Place one Side Panel C to one Centre Panel AB, 13″ sides RST, and sew using a 1/2″ seam. Press seam towards Side Panel C. Topstitch 1/4″ from seam on Side Panel, catching and securing the 1/2″ seam allowance underneath for structural support. Repeat on other side.
5) Attach Bottom Panel D.
Now that you have two side panels, it’s time to attach them to the bottom piece. Remind yourself that pockets are most functional when the opening is at the top and that will help you to remember where to place the bottom panel. 🙂
Lay the bottom panel RS down along the bottom edge of one Side Panel unit (ABC). Sew using a 1/2″ seam. Press seam allowance towards bag bottom. Topstitch 1/4″ from seam on bottom panel, catching the 1/2″ seam allowance underneath as with side panels in Step 4.

Place other edge of Bottom Panel D RST down along bottom edge of other Side Panel unit (remember pocket opening up!). Attach with 1/2″ seam. Press and topstitch as above.
Woohoo! Your exterior panel is ready to be set aside for a bit. Grab a chilled beverage or a cup of tea. Smile. Enjoy!
6) Prepare Divided Pocket F.
Fold fabric in half RST so that it measures 11×5″. Press. Check you’ve got it the right way or your fusible fleece/interfacing won’t fit properly and you’ll end up with goop on your iron.
Lay fusible fleece adhesive side towards WS of fabric so that long edge of fleece is along folded edge of pocket and there is a 1/2″ of fabric extending along the other 3 sides. Press and fuse according to the manufacturer’s directions. (This might mean you have to flip it so your fleece is on the bottom – just take care not to shift it out-of-place when flipping. )
Sew along edge of fleece using 1/2″ seam allowance, and leaving a 4″ gap at bottom of pocket for turning, backstitching at each end. Trim corners, taking care not to clip into stitching.

I didn’t leave a big enough gap and forgot to backstitch. Don’t forget like I did. 🙂
Flip pocket RS out. Press. Topstitch 1/4″ from top (folded) edge, backstitching at ends; topstitch 1/4″ from that, backstitching at ends.
Using a marking tool, mark dividing lines from top to bottom at 1.25″, 2.25″, and 4.75″ from left hand side (or as desired.)

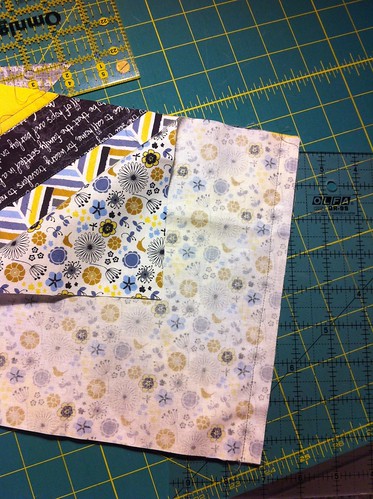
7) Prepare Large Interior Pocket G.
Prepare Large Pocket G in same manner as Divided Pocket F, with folded RST piece measuring 11×9″. Fuse, sew, trim, flip, press and topstitch as in Step 6 but don’t mark any dividing lines. (Unless you want divisions in this pocket. But it’s kinda deep for those…)

8) Attaching Divided Pocket F to Interior E.
Grab your interior pocket. Remembering once again that pockets work best when they open up, it’s good to keep in mind that the short edges of the Interior Lining (E) will both end up at the top. It’s a good idea to bring the top edges together and press the fold at the centres of the long sides (16.5″ sides x 17″ top) and consider the fold as the “bottom”.

Centre your prepared Divided Pocket F on Interior E about 4.5″ from the top edge. Pin in place and edge-stitch to attach pocket to Interior, backstitching at each end.

To divide the pocket, topstitch along marked lines, starting at bottom edge of pocket and working towards top edge, backstitching at both ends.
8) Attaching Large Pocket G to Interior E.
Centre prepared Large Pocket G on Interior E about 4″ from other top edge. Attach in same manner as Divided Pocket in Step 7, ignoring division instructions.
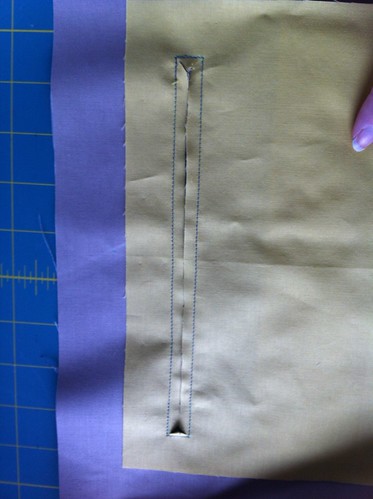
9) Prepare Zip Pocket H.
The fabric pieces are 10″wide and 7″ high. This will help you understand the orientation.
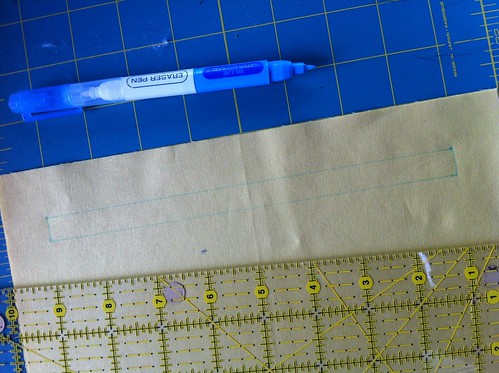
On wrong side of one piece, draw a box using your marking tool, that is 1/2″ high and about 8″ long, with the top of the box 1″ down from top of fabric piece. (If you think that this won’t leave you enough seam allowance to attach other side of pocket, make it 1.5″ down and 7.5″ long.)
10) Attach Zip Pocket H to Interior E.
Using the same end of interior that has the Divided Pocket F attached, centre your marked Zip Pocket H piece on Interior E, RST, so that top of the box you’ve drawn is about 2.5″ down from top edge of the Interior. (And just over an inch above your Divided Pocket.) Pin in place
Sew along the lines of the box you’ve drawn to attach the pocket to the interior, backstitching at start and stop.
Cut a line into the middle of the box (only inside that box) and clip into corners, taking care not to cut your stitches! Your cut will look a little like this: >———<
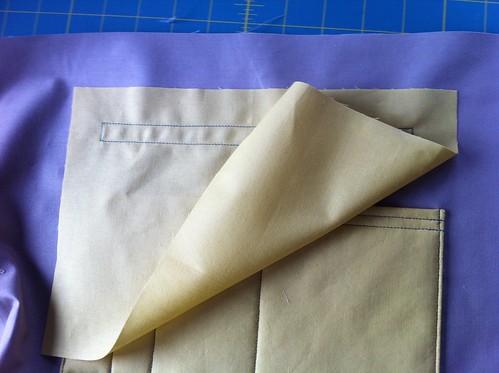
Gather up the zip pocket and push it through that hole you’ve just made so that the right side is facing out on the back. Press.

11) Attaching zipper.
I’m hoping you’ve done a zipper before because explaining zippers is not my strong suit. I have done several but I’m still a rookie, and let me tell ya, folks, this one kicked my butt! It didn’t turn out perfect, and zip experts will probably say I did it all wrong but it works, and that’s what I cared about. 🙂

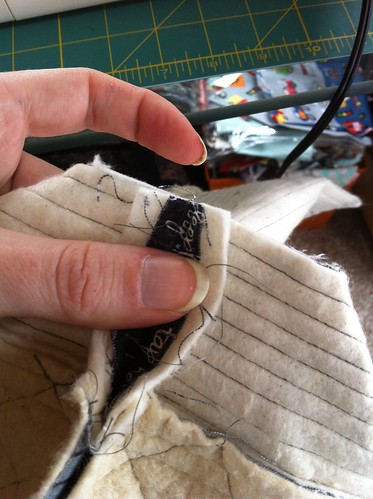
Pin your zipper into the opening you’ve made. You can change to a zipper foot, if you like, but you basically just want to stitch all the way around it so that you’re securing the zipper tape to the bag interior, backstitching at stop and start to secure. Take care when sewing over the zipper teeth!

Also, take care that your interior and Zip Pocket lining are pulled clear from the zipper or you’ll accidentally sew it to the zipper and you’ll need your seam ripper. I did. It looked like this:
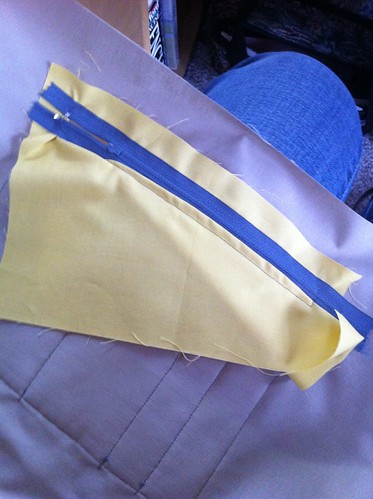
What’s really embarrassing is that I did it twice. If you find you did it once, it’s time to take a break, so that you don’t do it twice. 🙂
12) Finishing Zip Pocket H.
Take remaining Zip Pocket fabric piece and place it RST with the piece you’ve just added the zipper to. Pin together.

If you have a long zipper, it might extend past the edges of the pocket. That’s fine and, in fact, preferable, provided that you don’t end up sewing over the metal stop at the end of the teeth. Metal stop=broken needles/possible injury!
Again, taking extreme caution that your bag Interior is clear of the needle, sew a 1/2″ seam allowance around the edges of the Zip Pocket, backstitching at start and stop.
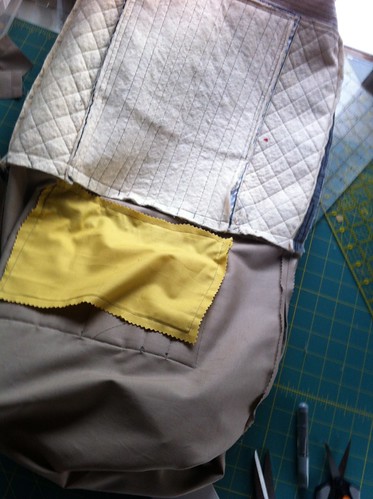
Woohoo! You should have two assembled pieces that look like this:

Time to do a little dance/stretch and refresh your beverage!
13) Side seams.
Fold Exterior Panel RST so that top edges meet and sides are aligned. Sew down side using 1/2″ seam, backstitching at top edge.
Repeat with Interior, but leave a 6-8″ turning gap on one side, making sure to backstitch at top and either side of gap.
14) Box bag corners.
Using a ruler, mark a 1.5″ square from the bottom and side seam stitching. (Don’t measure from the side edge or it will go all wonky on you. Measure from your stitching!) Cut this square away.

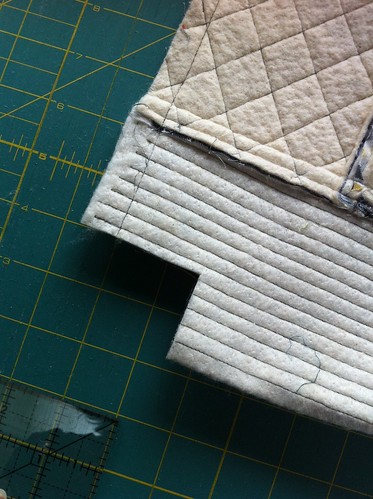
Pinch the bottom and side together so that the side seam meets the bottom edge, taking care to math the cut edges. It should look like this:

Sew 1/2″ from the cut edges, backstitching at each end. Repeat on other side for both interior and exterior. Press side seams open.
14) Attach Exterior to Interior.
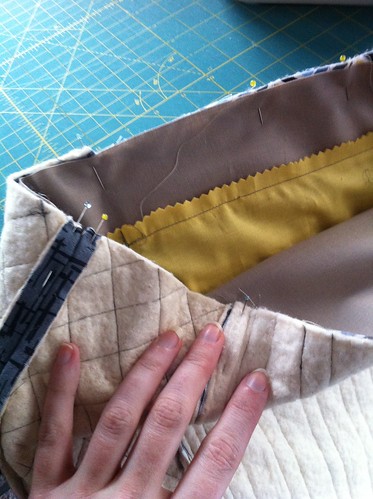
Flip your Interior so that RS are facing out. Slip it inside Exterior, RST, and pin along top edges, matching side seams. Sew along top using 1/2″ seam, backstitching at both ends.
Using the turning gap you made in the interior side seam, turn your bag right side out. If using cardboard to give a flatter bottom to your bag, insert it through the turning gap now.
Close your turning gap. You can hand-stitch it closed with a blind stitch or ladder stitch. OR you can be a little lazier like me and pinch the seam together and edge-stitch it closed by machine.
Push your interior inside the exterior, putting corners into corners, etc. Press around top edge. Topstitch 1/4″ from top edge, backstitching at each end; topstitch 1/4″ from that.
15) Make Straps I. Make 2.
With WS facing up, fold fabric 1/2″ in on each 6″ edge. Press.
Fold fabric in half WST lengthwise. Press. Open back up.
Fold long edges of fabric in towards centre crease, WST. Press.
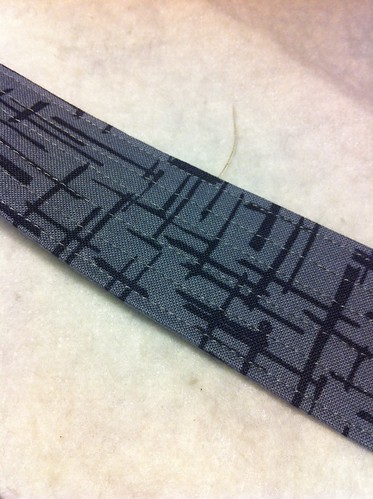
Fold in half again. Press. There should be no raw edges of fabric showing. Edge-stitch around strap to secure, backstitching at start and stop. Add topstitching lines about 1/4″ apart all down length of strap, backstitching at each end.
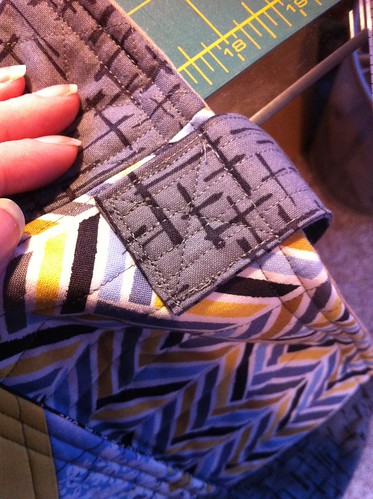
16) Attach Straps to bag.
This can be a little awkward to manoeuvre but if you feel comfortable, clever use of the reverse function can make it easier.
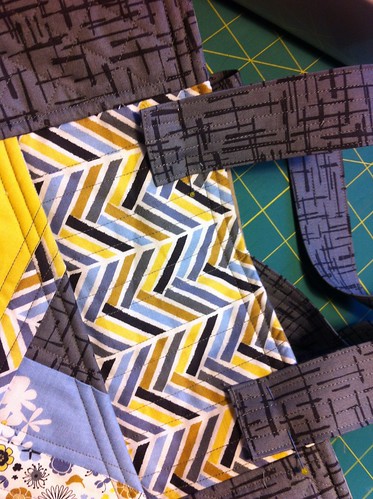
Aligning straps with the seam that attached Centre Panel AB to Side Panel C, pin in place approximately 1.75″ from top edge. Sew to bag by edge-stitching around outer edges and crossing the strap at the first topstitching mark. Then sew an X from corner to corner. Repeat with other end of strap at other side seam, taking care not to twist the strap before securing.
Oops! I should have trimmed a few threads before snapping this one…
Attach other strap.
And CELEBRATE! Admire your handiwork!
I hoped you enjoyed this tutorial – and trust me, it took way longer to write than to make the bag. 🙂
If you make one, we’d love to see it! You can add it to the Flickr group pool: The QAYG Guild Bag

Thanks so much for the amazing tutorial, Carly! As I was reading I was thinking, “Man, I’ll bet it took her longer to create the tutorial than the bag!”, so I had a little laugh at the end!
I read the whole thing. I’ve never made a bag and I’ve never put in a zipper, but you’re making me feel bold!
LikeLike
Aw, thanks, Heather! I kept having technical difficulties so it took me FOREVER but I’m happy with it so it was worth it. Glad you like it!
LikeLike
That looks really amazing – well done. Did you give final measurements of the bag (W/H/D)? And total height from bottom to top of handle? Can you please? Thanks!
LikeLike
Hi, Nicole! Sorry about that. The bag is approximately 12″wide, 13″high (22″high at height of handles), and 4″ deep. I’ll edit the tutorial now. Thanks for the catch!
LikeLike
Nicely done Carly! I sure like the herringbone QAYG. Like Heather, I was thinking that it must have taken forever to do this tutorial! LOL!
LikeLike
Ah! I just attached an en of each strap to the same side of the bag…. Instead each end of one strap to one side of the bag! Boooooo! Seam ripping…..
LikeLike
Been there! 🙂 Your bag looks ah-MAZ-ing!!
LikeLike
Pingback: November Birthdays « Crafty Coffin
Love your tutorial! And the Added inside pockets in the lining. Hoping to try your pattern real soon. Cindy form Saskatoon
LikeLike